This article talks about Sitecore serialization. Note that this is useful only if you have basic understanding of Sitecore.
What is Serialization
Serialization is used for synchronizing changes between different development environments, we can also use packaging for this purpose.
Serialization vs Package
In Package
- There is a size limit for the package of 2GB
- Once a package is installed, the changes cannot be reverted.
In Serialization
- There is no size limit
- There is an option to revert the item/multiple items and sub items or the database.
What does serialization do?
Serialization converts a database or a series of Sitecore items in a database to text files. A separate text file is generated for each item that it processes.
Once the process is over, text files are stored in Data folder under the Sitecore root folder.
For example, the file path could be C:\inetpub\wwwroot\<sitecore Instance Name>\Data\serialization\master\sitecore\content\Home\About Us\Awards.item
Which is the default setting, if you want to store the files in any other location then specify that path for SerializationFolder parameter in web config.
Each text file contains the following information:
----item----
version: 1
id: {1A88C9B7-2EE1-4DF4-A9AF-02277C46EE74}
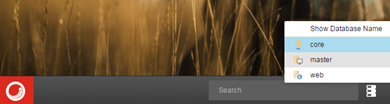
database: master
path: /sitecore/content/Home/About Us/Awards/
parent: {396614E1-FECB-43CF-A83C-81B166B338BB}
name: Awards
master: {00000000-0000-0000-0000-000000000000}
template: {E198F11E-98A4-4844-B343-C9D167720D0C}
templatekey: Banner
----field----
field: {A4F985D9-98B3-4B52-AAAF-4344F6E747C6}
name: __Workflow
key: __workflow
content-length: 38
{D6E6F244-2674-4455-96DD-ACD8A60548ED}
----version----
language: en
version: 1
revision: 3e31d4ea-64ec-4dcb-9bfa-549a24748e35
Ways to serialize
Using Content Editor :
- Login to Sitecore and open content editor, right click on the top ribbon and select the “Developer” option, you will see a Developer tab added to the ribbon. Select the item you want to serialize and in the Developer tab choose Serialize Item option under the Serialize group. If you want to serialize an item with its sub items then choose the parent item and select Serialize Tree option.
- Similarly in order to update an item with the information stored in text file you can click on Update Item from the Developer tab. If you want to update an item with its sub items then click on Update Tree or if you want update entire database then choose Update Database option.
- In order to revert item choose Revert Item from Developer tab. If you want to revert an item with its sub items then click on Revert Tree or if you want revert entire database then choose Revert Database option.
Using Sitecore service page:
Go to service page http://<domain>/sitecore/admin/serialization.aspx
To serialize, update and revert a whole database, under the Serialize and revert databases page, in the Select database section, select one or more databases that you want to serialize, update, or revert. Select Serialize {selected} databases, Update {selected} databases, or Revert {selected} databases depending on the action that you want to perform on the database.
In order to serialize a set of items, under the Serialize and revert databases page, in the Select database section, click Serialize preconfigured.
In order to update a tree of items under the Serialize and revert databases page, in the Update section, enter the path to the parent item in the file system and click Update specific path
Reference: https://sdn.sitecore.net/upload/sitecore6/64/serialization_guide_sc60-64-a4.pdf